Showing posts with label planning. Show all posts

Monday, February 9, 2015

Turquoise Voile Girl's Dress

3/3/2015 Update - Here is how the dress looked for our children's ball last Saturday:


It's not completely finished. I need to add the box plaiting at the hemline as well as adding a silk sash at the waist. Also, the child wants puffed sleeves instead of open sleeves and there was no time to finish that detail before the party. As a side note, it seems that this child also needs a new cage. Her current one doesn't seem to give the proper shape to this dress..... Alas, how my sewing list grows!!

2/9/2015 Update - Well, It's been three years since I purchased this fabric and many dresses (both modern and historical) have been made in that time. I do think that it's about time to finish... or should I say start, this project. It just so happens that the Dreamstress is hosting a Blue Challenge for her February Sew Monthly. Hopefully this will be enough of an encouragement to finish. If I am able to finish this dress, my dear daughter will be able to wear it as a party dress to our private Ball at the end of the month. Wish me luck! 

6/2/2013 Update - Here is the inspiration image for this dress. Unfortunately we only get a back view to admire.
Journal De Demoiselles March 1862

Of course I am talking about the little girl. Here is a closer look:
  

 I will not be doing the fluting at the bottom of the dress because I don't think that the fabric will hold the pleats. I will also need to get some silk for the belt and rosette.

Original Post 11/13/2012 - Fabric Mart just had a $1 sale on turquoise cotton voile.

I was able to pick up 5 yards and am planning on making a sheer dress for my young daughter. I can see a lined body with gathered, puffed, short sleeves, and perhaps some tucks in the skirt. Wouldn't a matching, sheer bonnet be nice as well?

I received the voile today. It is not as sheer as I has expected, but it feels very durable and has a nice shine. I look forward to making a nice dress from it next spring.

Wednesday, February 4, 2015

Making A Ball Gown ~ Finished

Ball Gown Update 2/4/15 ~ My dearest husband decided to surprise me with tickets to the Winter Ball in Gettysburg last Saturday. I was fortunate to have been told and was able to start at the beginning of January. As you can imaging, I worked daily to get my gown finished before the event. This lovely surprise moved my due date for this project up an entire month. Here's what I completed:


The first thing that I had to do was to remake my cage.... again. Our trip to Cedar Creek really destroyed it. I also added an attached bum roll to help with a back thrust for my skirts. I really like how it turned out but looking at the pictures, I think that I could go wider with my cage.

I do confess that most of the work went into the flounced petticoat or under skirt. There are 11 flounces and each one took an entire day. They are all hand hemmed and hand gathered. However, I did use the machine to attach the flounces to the base skirt. My favorite part about this petticoat is that I can use it under the wrapper that I have planned as well as for the skirt of my new sheer.

The silk for the bodice and over skirt came from FashionFabricsClub.com. It's called "Bronze Brown Silk Taffeta" and has an embroidered check design. I do confess that when I first opened the package I almost cried.... it looked like curtains. It had taken so long to arrive and I didn't have any time to send it back and order something else. I shoved it back into the bag and tried to forget about it for a few days. Finally, I pulled it back out and draped it on my mannequin. After a few days of looking at it draped like that, it slowly started to look like dress fabric.

The bodice and over skirt were finished in about a week. I used Past Patterns 704 for this and really like how the double puff sleeve turned out. I used a straight size 18, only taking in the side seams about 1/4 inch on each side. I also put in a gathering stitch to narrow the sleeve openings but other than that I made no alterations. It would have been nice if there was an actual bertha pattern included.

The bows were made from black silk satin organza. I wanted to use wide silk ribbon but everything that I saw was very limp and wouldn't have given the look that I was going for. The fabric was ripped into strips and hemmed on both sides. Then the bow was made and two were attached to the over skirt and one went into my hair.

I am already planning my improvements for this gown. I'm going to add a sheer bertha decorated with strips of the bodice fabric (if I have enough) and take a little bit off on the side seams of the bodice. I had wanted to also make a new under skirt of silk but after the gown was stepped on so many times and drug on the dirty ground, I may just stay with a washable (and bleach-able) fabric.

~ ~ ~ ~ ~ ~ ~ ~ ~ ~ ~

12/09/2014 - Wouldn't you know that as soon as I start on a major project, like making a quilt, along comes another major project, like making a ball gown. We are hosting a party that includes a dance master, gowns and a lovely historic venue. So, of course I have to have a ball gown. After all, you can't hostess a ball without one, right?

Here are some ideas that appeal to me:

I'm going for a two part dress such as the red one above. I really like the open bodice style.


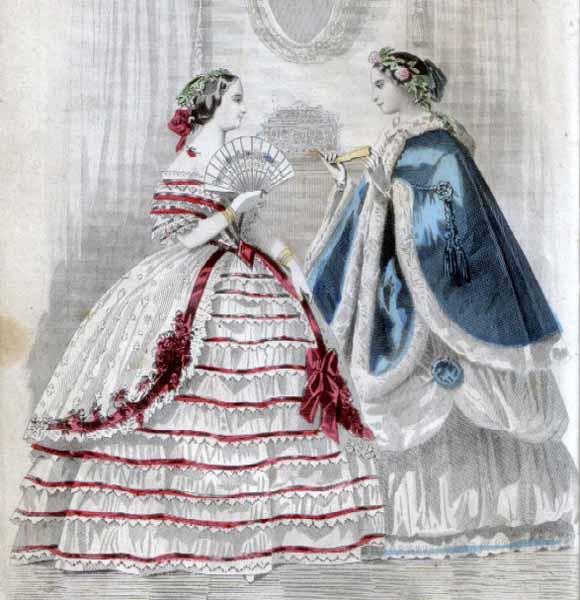
The ruffled underskirt is very nice on this one. For mine, I'm thinking a white underskirt and a colored over skirt.


I especially like this red one. 


I love this painting of Lady Elizabeth Gilstrap (1822-1891) by Richard Buckner (Newark Town Council, Newark, Nottinghamshire UK) . You can see her flounced, sheer under skirt. 

Currently, I have no silk. So, a sheer flounced underskirt would be a great place to start. I have until the end of February to finish my dress. Wish me luck!

Other Inspirational Gowns:

Here is a lovely example of a sheer flounced ball gown from the MET Museum


Godey's Lady's Book, December 1859
I adore the blue one on the far left. Is that 13 rows of flouncing that I see? Here's the description: Fig. 1. we have one of those characteristic tunic dresses, introduced of late, and notable for their novelty at least. Underskirt or petticoat of white silk, covered by innumerable small flounces. Tunic and corsage of blue satin; sleeves of white silk, with a ruche of blue; berthé trimmed with point lace.


Peterson's Magazine 1860
I had been wondering if ribbon trimmed flounces would be an option... and it looks like they are. Fig. I. -Evening-dress of White Tulle, trimmed with eleven narrow tulle flounces, edged with blonde and narrow currant-colored velvet. A tunic of spotted tulle is trimmed with a broader velvet, a long wreath of velvet flowers, and a large bow of velvet ribbon. The sleeves and the berthe, which is of a heart shape, are trimmed to correspond with the skirt. Wreath of green leaves and velvet flowers. 


I really like this yellow one as well. I could use some gold silk that I have for the bodice and bows and order something that coordinates for the over skirt.

Monday, November 24, 2014

The Story Of A Baby Blocks Quilt

First Update - 12/9/2014
So far I have only been able to log 6 hours on this quilt. It seems that starting a big project just before the holidays makes for a very slow start. I also didn't realize how long it would take to cut all of those diamonds out of newspaper and scrap fabric and then baste the two. I'm actually having a lot of fun with this project, I'm just glad that I hadn't expected to complete it until next April.


~ ~ ~ ~ ~ ~ ~ ~ ~ ~

Original Post - 11/24/2014
I am finally starting on an endeavor in quilting. I have fallen in love with a pattern and have been lent the instruction on creating it. I have some documented, period correct fabric with which to start. So, the next logical thing to do is get started.

This quilt will be a small child's quilt and done completely by hand. Here is an example of what I am going for:


The National Museum of American History also calls this pattern "Cubework" and "Boxes" and this particular quilt is made from 4" cotton diamonds. The overall measurements are 47 in. by 41 in.

I am very excited to get started on this project. I will be using the paper piecing method to construct this. It starts with creating a template and cutting out a lot of paper diamonds. Then the fun really gets going when I scour my stash scraps for pieces big enough and varied enough for this project. I'll just keep adding to this post for updates. So stay tuned.

Here's more quilting inspiration:
Follow Wrapped In Scarlet 's board Quilts on Pinterest.

Tuesday, June 17, 2014

Improvements To My Sheer Unveiled

As much as I would have loved to make an entirely new sheer.... I really just needed to fix the one that I had.... and so I did.... I hope. I'll start with the reveal. Here is my improved sheer for summer:


Now for the explanation: Here is the original research for this dress and to follow is the dress as it looked in 2012:

http://jessicadeandesign.blogspot.com/2012/08/flounced-sheer-dress.html

* The first thing that stood out to me about the dress is that the cage was not large enough. This style dress is not intended to be worn over a work hoop of 80". A new cage style made an immediate improvement. (Read about that adventure here)

* Upon taking the dress apart, I decided to work on the sleeves. I started by hemming the under sleeves. It wasn't a huge improvement but I felt really good about it. (here's a picture of just the under-sleeves) Next I moved onto those droopy puffs. They really drove me crazy so I divided each one into two. They stand up much better now. The sleeves also got a trim. I wanted those pretty under-sleeves to show more so the over sleeve was shortened by an inch or so.


* The next item of interest is that I never trimmed the dress. It is in need of 1100+ inches of black blonde. Well, there is no way that I could find that quantity of black silk lace so I am debating other options. I was strongly leaning toward embroidered net instead... and doing the embroidery myself. This is not a difficult task just a very time consuming one..... but much less time consuming than producing the lace from scratch. Now, I've been inspired to add silk ribbon to the bottom of my frills. I'm thinking a bias plaid would look really nice. Now to find the bias plaid silk ribbon... This of course is still not finished.

* On we go to the next improvement, which was able to be made at once. I made a new separate/detached bodice lining from scratch. I love it. Here is where it stood originally:

Here is my improvement:

My new lining also has darts. The old one was attached to the sheer and made it very bulky.

*Lastly, I got rid of that white collar and remade the bodice. Thankfully I had loads of that sheer fabric left and was able to re-cut an entirely new top. The first thing that I did was to add an extra two inches to the length. I was really stuck on what style to make. For a while I was set on a pin-tucked cross-over bodice (like this) and then I thought an infant style boat-neck (like this) with a white fichu would be better. In the end I went back to my original inspiration fashion plate (here) and a great picture of Emily Todd (here). A simple V-neck was all I did. After all, there is just so much going on with the flounces and puffed sleeves that the dress really didn't need anything fancy for the bodice.


For accessories I picked up a summer hat and borrowed the blue silk sash from my daughter's fancy dress. She never wears it anyway. I also pulled a brooch from my grandmother's jewel box. I think it gives a nice contrast.

I'm also still playing with the idea of a white ruffle fichu. White next to the skin is highly recommended in the 1860s. I especially like how the white over a blue flounced dress looks in this fashion plate.

Over all I think the improvements are taking me in a very good direction. I'm very pleased with it.

Want to know what else I'm dreaming about? Check out my inspiration/research board on Pinterest:

Wednesday, June 4, 2014

Gardening In June

From The Kitchen and Fruit Gardener 1847

June

If the weather in this month prove dry, the growth of many esculent plants will be considerably retarded, particularly the beans and peas which are in flower, the blossoms of which fall off before arriving at maturity, and, consequently, are not succeeded by fruit. A certain degree of attention is therefore necessary to give a regular supply of water to the growing crops.

There is no work in the kitchen garden which at this time requires greater attention than the eradication of weeds; many will now begin to perfect their seeds, which, being shed on the ground, will occasion a considerable degree of labour for several years to accomplish their extirpation.

Every part of the kitchen garden should now be kept in a neat and well regulated condition; and a constant attention should be paid to the progress of all seeds committed to the ground. Those that vegetate freely should be forwarded by hoeing, thinning, and watering; and in those cases, where the seed has failed, it should be immediately resown: no time should be lost when such circumstances occur. Some crops such as beets, onions, parsnips, and some others, may be restored by transplanting them from those places where they may have come up too thick. The depredations of insects should be guarded against as much as possible, until the crops are rather advanced; for after they have formed their rough, or perfect leaves, few insects attack them, at least not so as to endanger the crop. When recourse is had to watering, it should be applied as late in the afternoon as possible, or early in the morning, but never during the middle of the day. When the ground can be kept in a moist state during the warm months of summer, the most luxuriant crops may be expected.

Beans and Peas for late crops should be sown both at the beginning and also at the end of this month. Those which are now in blossom should be examined and topped. Earth up and otherwise stir the surface of the advancing crops, as necessity may require. At this time, the crops which were formerly planted should be hoed and earthed up. Cabbage and broccoli plants which are fit should be planted out. Transplant spring sown cabbage of all sorts for autumn and winter use. Earth up the early and general crops of cabbage as they advance; the former will now be advancing to maturity, and may be forwarded in cabbaging, if the leaves be tied together with strings of matting. The general crops of onions should, towards the middle or end of the month, be cleared from weeds: this operation should be performed with a narrow hoe, which will not only destroy the weeds, but by stirring up the surface, will contribute much to the growth of the crop. The crops of potatos as they advance should be earthed up. Prick out celery plants sown in March: a slight watering to be given every other evening. Continue to sow and transplant all sorts of lettuces: give plenty of water both to the newly sown and also to the transplanted ones. Tie up to blanch the forward crops of lettuces; choosing a dry day for that purpose. A full crop of kidney beans may now be planted. Propagate by sowing, cuttings, or dividing the roots, all sorts of herbs. A small sowing of ruta baga may now be made, deferring the principal one till the middle of next month. Beets may also be sown for a late winter and spring supply; the early part of June will also be timely for the sugar beet, If not attended to the preceding month.

Monday, May 26, 2014

Kitchen Garden Plans

Taken from The Country Gentleman 1854

"PLAN OF A KITCHEN GARDEN
Where all the work is done with the spade, and no ornamental planting is desired, the plan furnished by our correspondent ("A Pupil of the Cultivator,") is a simple and good one, and no doubt as well adapted to the intended purpose as any we could furnish. In the country, where horse labor is always at command, a great saving is effected by laying out the kitchen garden so as to admit the use of the plow, subsoiler, cultivator, and harrow.


In the above figure (Fig 1), we have endeavored to show an arrangement for this purpose, where dwarf fruits trees, currant and gooseberry bushes, &c., are planted in continuous rows across the garden; the crops of vegetables being panted between, and the whole cultivated by a horse, which turns about at the ends on the spaces or alleys, a, a. The flower garden and ornamental part occupy a strip at the centre, on each side of tho alley, b, b. If desired this part may be wholly omitted. Fig 2, shows the more common way of laying out kitchen gardens into quarters, where, it will be observed, horse labor can not be introduced."

Here we have an illustration of "the more common way of laying out kitchen gardens into quarters". Notice they are Not calling this a German Four Square Garden.

From The Gardener's Text-Book 1851

"INTERNAL ARRANGEMENTS
By the phrase "Internal Arrangements", we mean the division of the garden into quarters borders beds walks etc This laying out the ground must be regulated wholly by the taste of the gardener and we therefore venture to offer only a few hints in regard thereto instead of giving precise directions As far as our opinion may be worthy of notice we should recommend regular divisions made by the square and line Such are most easily laid out and most conveniently kept in order Serpentine walks with crescent star or bean shaped beds are all very appropriate for the flower garden but they seem hardly suited for such humble tenants as cabbages potatoes and onions It is a rule to be constantly borne in mind by the proprietor of a kitchen garden that his main object be utility rather than ornament.

At least one path should be of sufficient width to admit the wagon or cart which will be required at certain seasons to bring in dung or to carry off produce Foot paths need not be over three feet wide and the alleys between the beds not over twelve or eighteen inches The border extends all around the garden and is from six to ten feet wide with a foot path in front The beds ought to be narrow say four or five feet wide such being the most easy to cultivate The numerous alleys of course occupy a great deal of room but they possess the advantages of convenience and neatness in enabling the workmen to clean or gather the crops without trampling upon the beds The principal paths might be dug out to tire depth of two feet or more and then become places of deposit for the stones removed from the quarters A thin layer of gravel tan or even common earth would render the paths hard and dry to the feet at all seasons.

In connection with the above hints a diagram or plan of our own garden may be deemed not out of place It will be found on the following page It is in the shape of a parallelogram running east and west with the entrance on the south side The border inside the fence is about eight feet wide that part facing the west smith and east is adapted for such plants as require a warm exposure and the other for such as need shelter from the mid day sun In front of the border is a foot path three feet wide Directly in the centre of the garden is the tool house beneath which is a good location for a cistern Here meet the four principal paths winch divide the large plat into four equal parts or quarters as they are generally called by English gardeners These paths are of sufficient width to admit the wagon which can turn around the tool house and return through the same path so as to avoid the necessity of having more than one entrance The quarters are of equal size so that a four year rotation of crops may readily be observed The tool house and cistern being in the centre are convenient of access from every part of the grounds Currants gooseberries raspberries and quinces are set out on the edges of the principal paths running north and south and the grape vines are trained upon the fence Dwarf fruit trees might be placed in the border where neither their roots nor their tops would be likely to occasion much injury.


 This short description will enable any intelligent reader who approves of the plan to adopt it with such modifications as his own taste may suggest.

Although in this business of laying out a garden ornament is a mere secondary consideration yet perfect regularity and neatness are attained with little extra labor and they will certainly add much to the gardener's interest in the spot. The eccentric William Cobbett said that it is quite as reasonable for a man to take pleasure in a garden which is tastefully arranged and tidily kept as it is for a woman to delight in a fine dress and he will be as anxious to preserve the neat appearance of the beds and walks as she to protect her gown from dust or grease from being faded by the sun or eaten by moths. We all take best care of that which is most pleasant to the eye."

~ ~ ~ ~ ~ ~ ~ ~ ~


From The Kitchen Garden 1855

The Border
"A wide border (BB) will be carried entirely round the garden at the foot of the wall. This will serve according to aspect to raise early vegetables, to receive small seed beds of cabbages, lettuces and other things which are transplanted afterwards as well as those which require temporary pricking out such as celery, and part of it may be permanently occupied by sweet herbs, medicinal plants and other useful stock vegetables, part also may be devoted to horticultural experiments. It is convenient to have in a kitchen garden a little plot wherein to put surplus seeds and roots of flowers that are not wanted at the moment in the flower garden and the pleasure ground. Not only is it convenient to have such a supply in reserve to fall back upon in case of accident elsewhere but, as bouquets and cut flowers are always in request, these can be gathered ad libitum without fear of despoiling the parterre."

The Path
"A straight rectangular gravel path (PP) will go round the whole. Cross paths (pppp) will lead to the centre.... "

The Center
".. there should be, if not a fountain (F) with its basin to receive the water ejected, and always standing full ready for watering, at least a tank, or cistern, or shallow well, with a sufficient supply of water from some source or other."

The 4 Plots
".. there will remain in the middle, the four distinct open plots of ground (G G G G) which constitute the main body of the garden for cropping for the supply of vegetables in quantities."

Monday, May 19, 2014

Tools For Lady Gardeners

Taken from Gardening For Ladies 1843 which is mostly about the art of flower gardening. However, I have found it useful and enlightening in the way people of the time thought of the frailty of woman as well as the tools that were made to accommodate such frailty. For anyone interested in flower gardening, there is a gardening calendar at the back of the book that would also be useful.

A Lady's Gauntlet of strong leather.

Lady's Wheel-barrow


Watering Pots for Green-House Plants

Props for Climbers

Cast Iron or Zinc Tally for the Open Ground

Porcelain Tally for Pots

Tallies for trees, as in the case of an Arboretum, which is to endure for many years, are formed of iron, stone, or brick; those for herbaceous plants, of iron or wood; and those for plants, in pots kept in houses, of porcelain, wood, lead, zinc, and sometimes, though rarely, of iron. Tallies for plants kept in nurseries in pots, are commonly of wood, on which a little white paint is rubbed with the finger, and the name written with a black lead pencil; those for plants taken up and packed to be sent to a distance, are commonly of parchment, with the name written in ink, but nursery labels are formed of wood and tied to trees, or of pieces of lead stamped with numbers.... The cheapest kind of Tally is a thin strip of zinc, painted white lead, and then written with a lead pencil; and these of zinc may be had cut into proper sizes, at the zinc manufacturers.

Monday, May 12, 2014

Strawberries

This information about strawberries is taken from A Dictionary of Modern Gardening, 1847:

Varieties
Hudson or Scarlet - Grown almost exclusively for the supply of the Philadelphia market. It is distinct from the old Hudson in New York. It is undoubtedly the best.

Methven Scarlet or Keene's - Very large variety, sometimes exceeding five inches, it is but indifferently flavoured, but much admired for preserving.

Hovey's Seedling - A newly developed strawberry that is among the best. However, it needs to have other varieties planted alone with it.

Ross's Phoenix - Much praised in New York. A new variety that is hurt by drought where others are uninjured.

Cushing - A new variety from Philadelphia or Boston. (I'm not sure)

Myatt's pine - will grow profusely on light, rich, sandy, alluvial soils, near the sea. In such situations other strawberries are apt to throw out too many runners; and for such Myatt's plan is well adapted.

Others Listed but not described:
White Alpine, Old Scarlet, Grove End Scarlet, Roseberry, Garnstone Scarlet, Myatt's Eliza, Old Pine, Myatt's British Queen, Large Flat Hauthois, American Scarlet, Downton, Elton, Coul's Late Scarlet, and Turner's Pine.


The chief bearing time of these is from the end of June to the middle of July, but the White Alpine produces successive crops until November. I have even gathered from them a dish late in December.

If Alpines are planted on south west, east, and north borders, they will give a succession of fruit from June till December.

Beds, four feet wide, should be marked out with a foot alley between each, which is highly necessary to prevent those who gather the fruit from treading between the plants, and lastly, the runners are planted two feet apart. A bed thus made will last three years, without requiring anything further, not even so much as a top dressing.

The surface of the soil should be covered with straw, or the mowings from grass plots, during the bearing season, to preserve moisture to the roots of the plants, and to keep the fruit from being dirt splashed.

Monday, May 5, 2014

Gardening In May

From The Kitchen and Fruit Gardener 1847

May

Let all the coverings that may have been used to protect either winter or early spring crops, be now cleared away. Rough dig all vacant ground, and hoe and rake all the small borders. Use the hoe freely amongst crops of onions, spinach, &c. Destroy all weeds as they appear. Have all roots, docks, dandelions, and similar weeds, carefully dug up with a fork, and immediately removed from the garden. Be careful to destroy all snails and slugs.

After a shower of rain, draw the earth up to the stems of cabbages and cauliflower plants. Birds being very destructive to the seeds of all the cabbage tribe, it will therefore be necessary to guard them by covering the beds with mats, or with old fishing nets, until the seeds begin to vegetate.

Sow and plant all sorts of cabbages, and earth and clear from weeds the crops already planted. Take advantage of dry weather to stir the surface about the stems of all the forward crops of cabbages, by which they will be greatly strengthened. Sow full crops of savoys both at the beginning and end of the month.

Peas should be sown twice this month, or in succession, as the previous sowing appears above ground. Beans likewise, at similar intervals of time, when frequent crops are required. Of the dwarf kidney or bush beans, there are many varieties; among the better and more productive kinds, are the red and brown valentine, and China red eye.

The Lima and the Carolina, or Servee beans, may now be planted.

Rhubarb may be sown or planted. The large giant rhubarb is the most productive in the open ground, and Buck's scarlet for forcing.

Carrots should now be sown, - the long orange and the early horn, are the finest for table use. A full crop of parsneps should also be sown.

The celery plants which were sown in March or April, for an early crop, should be pricked out about the middle or latter end of this month, into a nursery bed of rich light earth.

Plant the main crop of potatos. This is the best month in the year for the purpose. Sets should now be used, cut to two or three eyes only.

Continue to sow and transplant lettuces of all sorts. Sow each sort separately, and repeat the sowings and plantings once every fortnight or three weeks, that a regular supply may be obtained. Sow radishes of different sorts every week during the summer. Give plenty of water in dry weather: if this be not attended to, they will be hard, and unfit for use. Thin the crops already sown.

Peppers or capsicums, and tomatos, may be sown for transplanting; cucumbers, squashes, nasturtiums, and other tender vegetables, may now be safely planted. All pot herbs such as thyme, sage, mint, balm, &c., should now be planted.

Tuesday, April 29, 2014

Drawnwork In Linen


I was very pleased to find this drawn-work d'oyley in The Lady's Friend 1864. It is made of unbleached Irish (course) linen and bound with purse silk in magenta. There is also mention of a silk lining in a bright color.

Friday, April 25, 2014

Outdoor Seating

Having a place to sit and relax to admire your gardening accomplishments as well as the great out doors is very important. Here is what is said about outdoor seating in A Dictionary of Modern Gardening 1847.


SEATS
"SEATS require to be in unison with the portion of the pleasure grounds in which they are placed. In shady retired spots, they may be made of the limbs of trees, (see Rustic) but near the house, or among the parterres, where trimness is the prevailing characteristic, more art is desirable to be apparent in their construction. They may be made of wood, and so constructed as to shut up, so that the seat is never wet; and if painted annually they last for many years. Made of iron, they are more in appearance, and if painted yearly, will not iron mould dresses which rest upon them. Being made of open work, the wet does not rest upon them, and they are soon dry even after heavy rains. The following (Figs 153, 154) are made by Messrs. Dean, King William Street, London.

Friday, April 18, 2014

Ornamental Garden Fences

Here is an illustration of ornamental garden fences from A Dictionary of Modern Gardening, 1847.


"The figures 42, 43, 44, illustrate three simple designs, formed by straight slats or pales, and therefore of the least expense; they are readily executed, and agreeable from their simplicity. The colour which should be used, is of course a matter of taste; white is generally preferred, though dark shades, even jet black are the most pleasing to many."

I personally like the center one, painted white, for it's simplicity and ease of instillation.

It is interesting that the book also mentions a reference to a fence law passed in Pennsylvania in the 1700s stating that "all cornfields and grounds kept for inclosures within the said province and counties annexed shall be well fenced with fence at least five feet high and close at the bottom". Living in said province, I can personally attest to the need for such a fence especially around the corn as well as tomatoes, peas, lettuce, squash and anything else that you want to grow. Without a fence as described, you will loose all that you have planted to the deer. The need to make a law concerning this is a bit baffling however. By 1728, the book tell us, that the law had been amended to state that the fence only had to be 4 foot tall and could be off the ground as much as 9 inches but no more.

Tuesday, April 15, 2014

Spring Goals

I haven't been doing much historical sewing this year... or last year for that matter.... so I'm a bit behind in marking projects off of my goals list. For this reason I am deciding to scrap the list and start over with.... whatever I feel like doing. I'm looking for instant gratification in the form of improvements to current items, wrapping up UFOs, or quick start to finish projects.

Honestly I don't really know where to start. It seems that all the projects that I see are multi part or group projects. Here's what I mean:

~ I'd like to make improvements to the bodice of my blue sheer but first I should make a new fashion corset and 120" hoop.

~ I Will Finish My Tan Dress!!! This also needs the fashion corset and larger cage listed above.

~ Fashionable hat. I especially want one with a black lace veil (mid-century sun glasses). To make this simple, I'm looking for a straw hat to decorate with ribbon and silk flowers.

~ A traveling bag would be very nice. I think that I will start one and work on it at events. I already know what I want to applique on the front.

~ I love sewing challenges so I am starting my own. It's the Undergarment A Month Challenge. The rules are to make one undergarment each month. Alternate monthly according to personal need but be sure to include chemises, drawers and petticoats. Extra corsets and hoops are optional. Each participant that completes the 12 month challenge wins (by the work of their own hands) full sets of brand new underpinnings.

Saturday, March 1, 2014

Sew Fortnightly Bodice Challenge


I have decided to join the Sew Fortnightly 5th Challenge -

 Make a bodice


The rules:
  • #5: Bodice - Make a bodice – a garment that covers the upper body.  You can either abide by the strictest historical sense (see the blog post for history of bodice terminology) or can explore the idea of bodices in a more general sense.


  • For this challenge I am going to make an under-bodice for my younger daughter. This bodice will have a band with buttons to attach her hoop. I'm thinking a bateau neck with no sleeves, it will button up the back. I haven't done button holes for some time so it will be good practice.

    This project is due March 15th. Wish me luck! :)

    Thursday, February 6, 2014

    Agate Buttons - 1856

    "Fig III. - A New Style of Dress and very beautiful. The corsage is closed up the front with agate buttons and made nearly round at the waist where it is confined by a belt with a gold buckle. A frill of rich black lace forms the braces. The sleeves are quite short the upper port is made of puffings confined by bands running lengthwise. The lower part of the sleeve is a short but wide pagoda and trimmed with black lace." From Peterson's Magazine September 1856

    Monday, August 12, 2013

    Starting On Winter Wear

    It's still very nice outside but the cold weather will be here before too long so I think that I should start on some warm garments for my children. After the cold temperatures have arrived is not the best time to start on these things. I'd rather be well on the way with only a few finishing touches when Old Man Winter starts blowing in my door.

    I am still planning on finishing my tan and burgundy dress for use at the Remembrance Day Parade, November 23rd in Gettysburg. My bonnet is acceptable as it is now and I only have a few touches to add to the jacket that I made last year. Mostly, I would like to make crochet closures for down the front of it.

    I love lists so here goes:

    ~ crochet closures and maybe some trim for my blue jacket
    ~ red wool petticoats for myself and my older daughter
    ~ long sleeve tunic and belt for my son
    ~ short button pants for my younger son
    ~ pants for my older son
    ~ wool gaiters for everyone
    ~ traveling bags for myself and my older daughter
    ~ finally finish the wrapper for my younger daughter
    ~ gloves

    Here's my list for the year. So far I am not on schedule but it's all fun anyway.

    Thursday, August 1, 2013

    Traveling Bag

    I added a traveling bag to my to-do list a few weeks ago. This particular bag goes over the arm and is embroidered. I have no time to embroider such a large design and have been looking for an applique instead. Here is one that I found in Arthur's Home Magazine 1858. Notice that the description says that it is suitable for a bag.

    Wednesday, July 31, 2013

    Footed Night Dress

    I just love this little footed night dress found in Godey's 1858. This is such a cute project that I think I will add it to my fall/winter projects for this year.

    Monday, July 29, 2013

    Bags For Boys

    I have been wanting to make a bag for each of my boys. They would benefit greatly by having a bag of their own to carry small toys and snacks. I will collect images on this topic and record them in this post.

    Woodcut entitled Blessed Be The Peacemakers from Godey's 1858
     
    This appears to be a cross body type bag with perhaps a loaf of bread in it.

    Friday, July 26, 2013

    Peach and Grey Checked Dress

    6/4/2013 - I purchased this fabric last year (here) and will be making a dress from it this month.


    It will be a long, bishop sleeve, fitted bodice dress with a tucked skirt for my 8 year old daughter. The fabric is shirting so the bodice will be lined. I'm not sure if I will line the sleeves as well. This will be a simple winter dress.

    The pattern for this dress can be found over at The Sewing Academy.org. It's the HMP/SA 250: Girls’ Dresses Pattern. I love this pattern and will be using a straight size. It will start out a bit big but my daughter will grow into it and be able to use it again next year. The added tucks may even allow her to get a third year out of this dress.

    7/17/2013 Update - I was able to get some work done on this dress and I wanted to take a moment and share. Here is an image of the bodice (I decided on a yoke, gathered bodice) and the tucks on the skirt. Since I used cotton shirting for this dress, it doesn't like to hang well. To give it more weight at the hem, I gave a generous turn of 4" as well as three 1" tucks (each tuck uses 2").


    Usually I don't calculate the amount of yardage that I used but this dress is to be entered in a fabric stash contest and the yardage is important. The skirt being three panels around and each being a full yard gives three yards to the skirt. The bodice, being the yoked style and given extra in the gathered part in the front, the natural waist for the back and lined with plain cotton all cut to the natural waist style, used an entire yard and a half itself.  For the sleeves, I chose the full bishop variation that uses but 2/3rds of a yard. Then there is the miscellaneous pieces used for the waistband, binding the neck and sleeve cuffs. In total this dress will use 5.5 yards. This is of course without decorations.

    7/26/2013 Update - Well, I'm a bit overdue on this since I wanted to have it made last month. Here it is, all finished. There are but three tucks and plenty of room if I want to add some more. The sleeves had to be pieced because I decided, after I cut them, that I wanted them to be a bit longer.

     
    Here's a close-up of the pieced sleeve: